Before we mention the solutions, we would recommend that if you are considering replacing the D3D11.dll file with a clean version from a third-party website, you should avoid that completely. Their versions might contain malicious code and you will end up putting your system at risk. Now, let us find out the fixes to resolve this error.
How do you fix DLL is either not designed to run on Windows or it contains an error?
The “DLL is either not designed to run on Windows or it contains an error” bad image error can be fixed by using some general fixes. Update or reinstall the software to the latest version, ask the vendor for the latest version of the DLL, or simply run a System File Checker scan. These methods should fix the error for you.
How do I fix d3d11 DLL?
To fix D3d11.dll errors, try installing the latest version of Microsoft DirectX, scan for malware and viruses on your system and then eliminate the viruses, perform an SFC scan, or perform a system restore to a point when you didn’t receive this error. In case these fixes don’t help you fix the error, try reinstalling the application that is giving a D3d11.dll error.
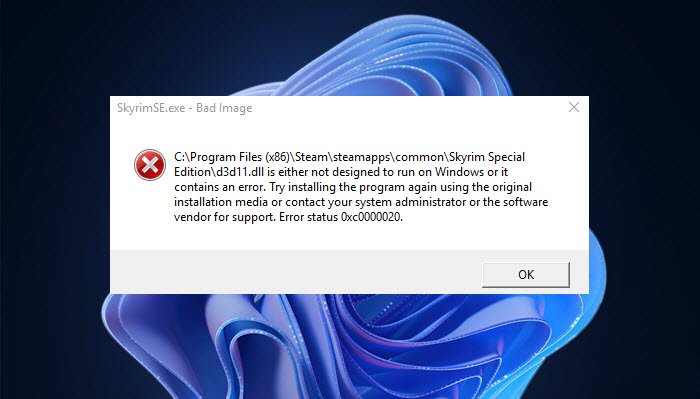
Bad Image, D3D11.dll is not designed to run on Windows, Error 0xc0000020
Here are the methods to fix the error D3D11.dll is either not designed to run on Windows or it contains an error:
1] Run System File Checker Scan
This error is most likely a result of corrupted or damaged system files on your PC. So, before trying some other solutions, you can try repairing the damaged system files. To do that, you can use the built-in utility in Windows called System File Checker (SFC). It is a command-based tool that scans your system for corrupted or damaged system files and restores them to a healthy state. You can try running an SFC scan via Command Prompt and then check whether the problem is fixed. Here are the steps to run an SFC scan on Windows 11/10: If performing an SFC scan doesn’t resolve your problem, try the next potential method from this guide. Read: Fix ISDone.dll error, Unarc.dll returned error code.
2] Re-register the D3D11.dll File
In case the above methods didn’t fix the error for you, you can try re-registering the D3D11.dll file and then see if it helps you get rid of the error. This method has proven to fix the error for some affected users and might just work for you as well. You can use Windows built-in utility called Regsvr32 tool for re-registering DLL files. It is a command-line tool that enables you to register and unregister OLE controls like DLL or OCX files in Windows. Here are the main steps to re-register the D3D11.dll file on your Windows 11/10 PC: Firstly, open the Command Prompt with administrator rights from the taskbar search option. Type CMD in the search box, hover the mouse over the Command Prompt app, and then select the Run as an administrator option. Next, type the following DLL re-registration command in CMD: After that, press the Enter button and wait for the command to execute completely. When the command is finished, close h CMD window and then restart your system. On the next startup, check whether the “D3D11.dll is either not designed to run on Windows or it contains an error” error is now fixed or not. If this doesn’t give you any luck, we have one more method to fix the error. So, move on to the next potential fix to resolve the error. See: How to fix Missing DLL files errors on Windows.
3] Replace the D3D11.dll file with a local copy manually
In case the above solutions don’t fix the error for you, you can try replacing the D3D11.dll with a fresh copy manually. Some users were able to resolve the error with this method and you can also try doing the same. Do note that we have two different d3d11.dll files on Windows –
One is located inside the C:\Windows\SysWOW64 folder andOne inside the C:\Windows\System32 folder.
For 64-Bit Windows, we are going to replace the d3d11.dll file which is located inside the SysWOW64 folder. Warning: You need to be sure of what you are doing before attempting this method. Because the steps need some technical operations and you must be familiar with Command Prompt to carry out this solution. If not performed correctly, it can cause some problems on your PC. Hence, please opt for this method if you are confident of what you are doing. Now, here are the steps to replace the d3d11.dll file with a local copy manually:
4] Reinstall DirectX 11
If nothing helps, you may download Microsoft DirectX and reinstall it on your Windows system. This should help. Now read:
MSVCR100.dll, MSVCR71.dll, or MSVCR120.dll is missing.Program can’t start because AppVIsvSubsystems32.dll is missing.

